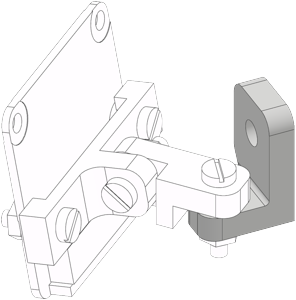
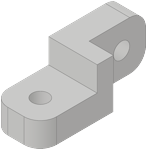
Hinge mount
A simple 3D printable hinge mount that you can use to mount a Raspberry Pi camera module or one of my Raspberry Pi cases onto any suitable surface, like a wall or another case. It provides three degrees of freedom if chained, two otherwise. A bolt and nut with a ø2mm and a minimum length of 8mm is required as shaft and you can lock the position by tightening it. If you don't have a suitable bolt and nut available you could try a screw instead.
A similar alternative would be the Ball and socket mount.
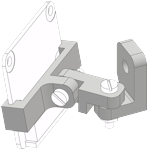
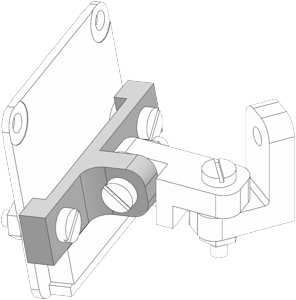
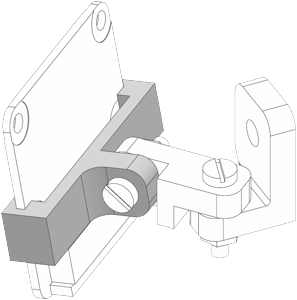
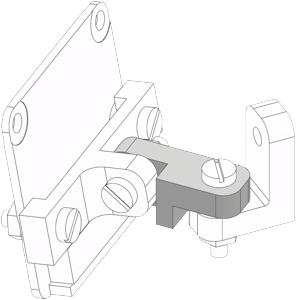
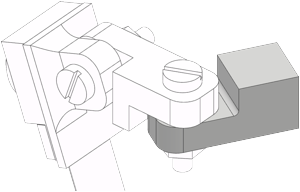
For this hinge mount you need to print at least two parts (or more if you want to chain). After you printed them at the stated printer settings you have to assemble them with a bolt and nut (multiple if chained). You can use the images as a reference, it is simple. After aligning it as needed, you can lock the position by tighenting the bolt and nut.
Usage examples
This are some examples how you may use the hinge mount independently or in combination with my other projects.
Install a Raspberry Pi camera module onto any suitable surface, like a wall or another case.
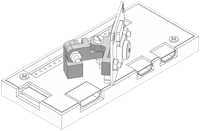
Mount a Raspberry Pi camera module ontop of one of my cases for Raspberry Pi / Pi Zero. For example Case for Pi Zero or Case for Pi Zero with integrated mini camera may be used.
Use this wall mount to install and align any of my Raspberry Pi cases on any suitable surface. For example Case for Pi Zero or Case for Pi Zero with integrated mini camera may be used.
3D printing
While designing my parts I always try to optimize their design and orientation in a way that they are as robust as possible but won't need support structures while 3D printing them. Of course you can rotate the parts around the Z-axis prior to printing, but please don't do so on the X/Y-axis. A layer height of 0.3mm is optimal. Because of the small size I print them all at 100% infill.
Requirements
- A 3D printer to print the .stl files on this page.
- Bolt and nuts with ø2mm and about 8mm length to use as shaft and position lock. Temporarily, screws work too.
Mount for Raspberry Pi camera
Screw mount
This mount should fit on all available "full size" camera modules for Raspberry Pi (official and third party).
There are little cutouts on the inside around the screw holes that are needed because the official v1 and third party cameras have a little SMD capacitor extremely close to it. Just in case you wonder.
You can use this mount in multiple ways. The example assembly image shows the simplest. Only two screws (or bolt and nuts) are needed. Another way would be to combine it with the front cover from Case for the Raspberry Pi camera. Other ways of use I can think of are M12 mount on Raspberry Pi camera module or IR cut filter with M12 mount on Raspberry Pi camera module.
Attention! Depending on the camera module type there can be small and sensitive SMD components near the installation holes. Be careful not to damage those and use screws (or nuts and bolts) that have a head diameter that is small enough to not touch them!
Slide mount
This mount should fit on all available "full size" camera modules for Raspberry Pi (official and third party).
Put the camera module into the left and right nut and slide it to your desired position. A little force should be necessary, but not too much. Friction will then keep it at position. If it takes too much force to insert it, you may have to clean the part or tweak your printing settings and try again. Or try the Screw mount.
Stick-on mount
This is a special mount for the third party mini camera module. Those have a glue pad on the backside that you can stick on the flat surface of this mount.
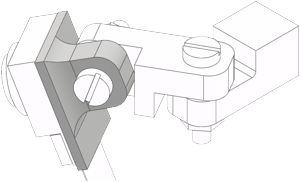
Axis-flip / Chain-connector
If you need more than two degrees of freedom, you can use this chain-connector to achieve this. It fits between a camera mount and the case or wall/surface mount, or even between two case or wall/surface mounts. Of course you can also chain multiple of these together.
Axis-flip / Chain connector.
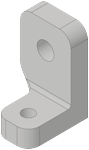
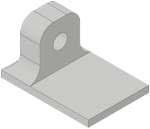
DownloadCase mount
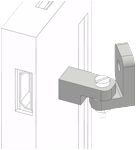
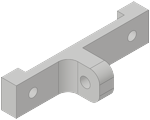
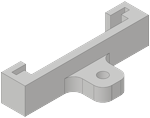
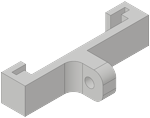
With this part you can install your hinge mount assembly onto many of my cases and other thin objects. Because the screw goes in from the backside, only thin objects like a thin plank may work (walls rather not). For walls or other surfaces you can use the following Wall mount. Some cases that this mount could be used on are: Case for Pi Zero, Case for Pi Zero with integrated mini camera or Case for Raspberry Pi camera module (backside cover needed).
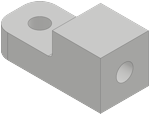
Case mount with horizontal hinge connector.
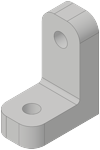
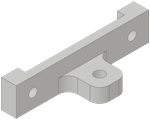
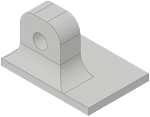
DownloadWall mount
You can use this part to install your hinge mount assembly onto a wall or balk or any other suitable surface. The screw goes in from the front. My setups are usually small and light, so I only need small screws/nails. Those prepared variants with ø2mm and ø3mm holes can be downloaded below. But I can prepare bigger variants if needed.